So it’s winter, officially! After the big storm in Ontario, there’s a nice thick layer of frozen white water called snow. That means it’s time to whip out the sled. That is, of course, if you have one. Introduction to Snowmobiling covers a bit about buying a snowmobile, snowmobile maintenance, and all the other bits and pieces that come with sledding.
At the very end of this post, there is a link where you can download a free, Snowmobile Survival and Breakdown Checklist printable, no questions asked.
Discloure: Posts may contain affiliate links. Purchases made through our links result in a small commission to us at no charge to you. We only recommend products that meet our brand standards based on testing and first hand use by our authors.
A Brief Intro to Snowmobiling
My first experience ever on a sled was around 12 years ago. A corporate job took me to the mountains in Whistler, British Columbia for a commercial real estate convention. My realtor had secretly booked us for a day in the mountains on a guided sledding tour. The trip just got a lot more exciting as the pleasure box of the checklist got ticked.
Shuttled by bus, halfway up the mountain to a little off-grid log cabin where we suited up in snowmobiling gear to go sledding. After a simple and quick gear up, off we were to tour the upper half of that very mountain.
Our snowmobiling guide was quick to analyze our ability and even though we were completely new to sledding, he was confident enough in what he saw to take us on the “challenging” snowmobiling trails. It was a day I would never forget, as it was one of the funest days I have ever had. It was also an eye-opener – it’s not that complicated or hard to drive a sled.
Heads Up: It’s a Short Snowmobiling Season
I figured the best way to start Introduction to Snowmobiling is with a stark warning. Unless you live way up north, it is a very short sledding season.
Fast forward from the Whistler trip to 2018, and I found myself buying a sled to go with our newly acquired cottage. The lake froze by mid-October and was more than safe by mid-December. That was a very good year as the lake was safely solid into late March, which provided a full 3 months. We also had a ton of snow that winter.
In more recent years, it’s not until mid-January that the lake becomes sled-friendly. It also seems to have a cutoff at some point in March, which provides a season of 2 to 2.5 months!
To those who are new to snowmobiling, snowmobile trails have a lot of water crossings. These trails become very disjointed when those crossings are no longer safe. To complicate matters, the trails themselves need a lot of snow. The snow has to accumulate, pack, accumulate, pack and so on, which creates a solid base for sleds. This process makes the trails smooth let alone rideable.
Last year, for example, the lake was still fine, it was the snow melt on the trails that ended the season!
Below is a super short video showing a backcountry river at the beginning of February. While not deep, it’s one of those rivers that never freezes, but it sure is pretty. We’ll talk about ice safety farther below, just remember that water bodies range from wide open to frozen solid.
A Short Season Means Two Big Considerations
Cost vs Return
If sledding is your main or only hobby, or you are blessed with cash, by all means, spend the money and go nuts on that shiny new snowmobile.
Failing that, I suggest buying something reliable, but affordable so you can enjoy other outdoor activities. Instead of making payments on a sled in June, you should be out on a boat.
Sorry to the hardcore sledders, but my ATV runs 365 days a year. It even plows my driveway or winches things, which is called “work”, so naturally, that’s where I dumped the bulk of my toy budget.
Further Reading: Is Snowmobiling in Trouble? Our Best Analysis
Getting back to sleds, when it’s minus 20 outside and you are 40 km out in the bush, you don’t want your sled to break down on you either. Other than replacing a belt, which is routine maintenance, my sled has never let me down. That’s not bad considering the sled was bought for a mere $4,000. I am talking about pre-COVID pricing.
A bit bigger budget, to the tune of $6,000-$8,000 opens the doors to a lot nicer sleds than mine! This is the kind of budget I would suggest to someone new to the sport.
One also needs to consider the other costs of snowmobiling, like a snowmobiling license, trail passes, insurance, snowmobiling gear, maintenance, gas and so on.
Down Time
BEFORE the snowmobiling season, make sure your sled is mechanically sound! If you blow a track (which happened to me last year on our other sled) you could be out for weeks. It can take a while to find and order snowmobile parts.
If you can’t fix it yourself, it may also be challenging to find a mechanic who isn’t buried in other jobs. I also blew a stator on the same sled last year, which added some more weeks to the downtime. Hope you see where I am going with this.
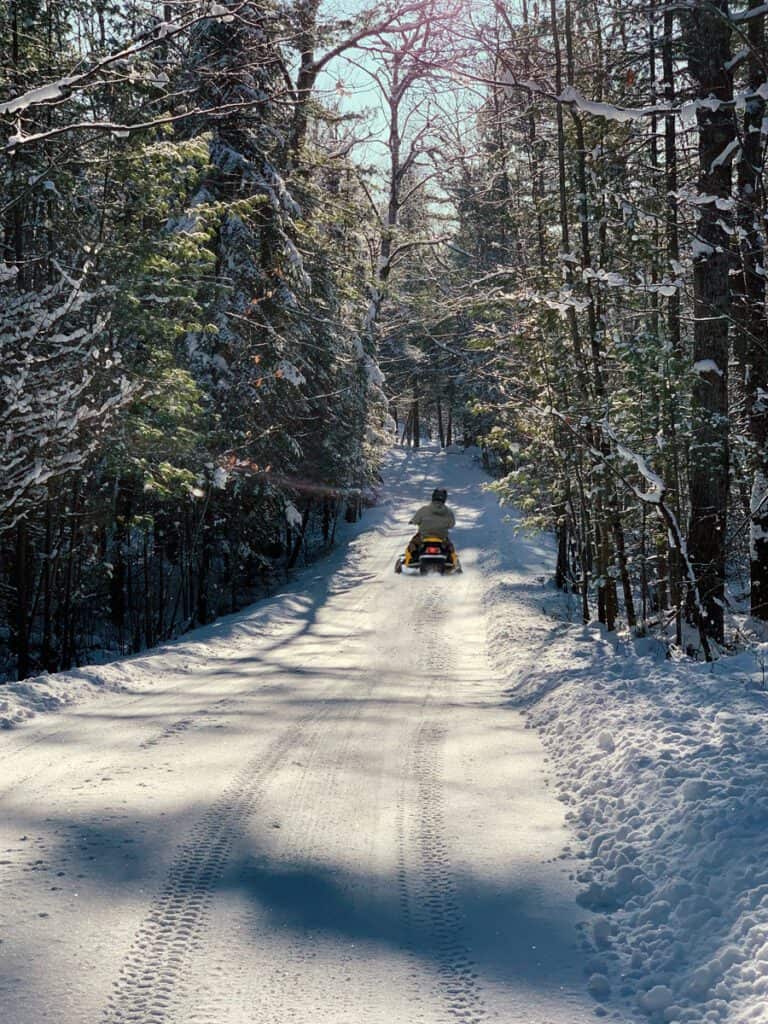
Between all the costs, potential downtime and now the complication of losing trails, I often wonder, is snowmobiling in trouble? Things aren’t exactly going the way they should, but we’ll hang on for the ride as long as we can.
Let’s Talk About Snowmobile Brands
Ski-Doo Snowmobiles
The majority of sleds around here are Ski-Doo (Bombardier). They’ve very successfully penetrated the market and carved out their share. Granted, I’m in Canada, maybe it’s a pride thing or maybe they’re just damn good sleds.
I know mine is! Four years in on a 16-year-old, $4000 sled, and I’ve only replaced an $80 belt! I failed to mention, that it had over 11,000 km when I bought it, which is getting up there on a 2-stroke.
You don’t have to go with the masses, but generally speaking, when you see a lot of a certain brand, there’s a reason and it’s usually price, reliability, styling, etc. Maybe it’s a bit of everything, who knows? My point is that it’s not by accident. What it also means, is that snowmobile parts (including used), will be much more abundant.
In the event of a breakdown, there are a lot more people around who understand your sled and can lend a hand. This means, not just in the shop, but also on the trails. You’d be surprised to see how people take care of each other out there.
I also have to say, that repairing this sled is very easy. Undoing the clips to open the side access panels puts everything you could ever need conveniently at your fingertips. Routine snowmobile maintenance and getting to most parts is easily done. Part placement is also very well thought out.
Check out Ski-Doo Canada’s current lineup.
Yamaha Snowmobiles
I also see a lot of Yamahas on the snowmobile trails. Yamaha makes a really good product in general, and I speak from experience. Between the various toys, we have 5 Yamahas in the family. Our other sled is a 2006 Yamaha Attak. It was trouble-free the first year we had it, since then, it’s been a breakdown magnet.
The Attak, however, sports a full 1000 cc, four-stroke, racing motorcycle engine, which Yamaha had to tame a bit for sled-friendly RPMs. It has a very unique dual exhaust, which goes under the seat and comes out the back. I’ve yet to come across a sled that can make that kind of a sexy rumble, and watching the steam roll out of both pipes on a cold start is nothing less than magical. I’m serious, if you stand there and wait for it to warm up, you know you’re in for a real treat as you anticipate your upcoming ride.
It’s in the fleet for a reason, but I bring it up because it describes some of the things that Yamaha comes up with, and why they’re such a contender.
Yamaha Comes With Some Challenges
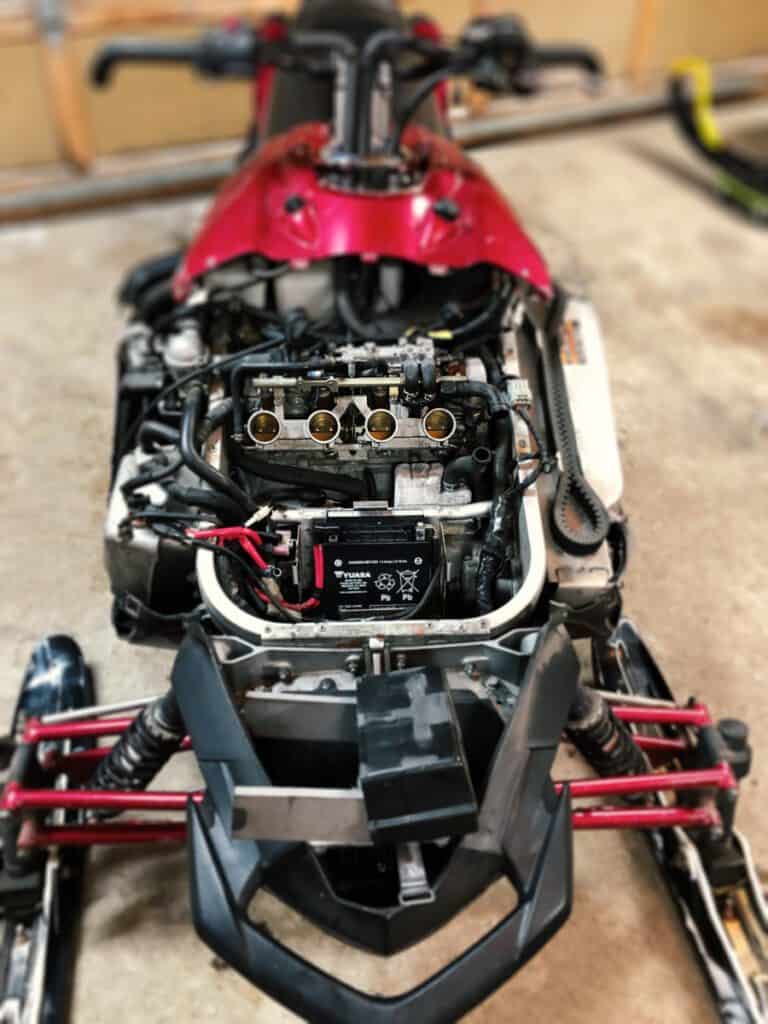
I must admit though, working on a Yamaha is a royal pain in the ass! It takes me 4 hours to do an oil change on the Yamaha Attak. The dealer congratulated me as they do it all the time as it takes them 3.5. I’m sorry, but that is not normal. Seriously, it should be a 10-minute job!!! It’s as though their engineers have absolutely zero regard for the fact that people actually work on these things from time to time.
Not to go off on tangents, but our Yamaha Side-by-Side is the perfect machine for what our family needs. I test-drove multiple units from all the major brands before deciding this was the one that ticked all the boxes. Even on the SxS, after several attempts and curse words later, I just can’t seem to adjust the handbrake! They placed the adjuster in the worst possible location, and it’s something that should be very accessible.
Yamaha makes great machines that are worth looking at. The moral of this piece is to suggest upping the budget a bit if you take the Yamaha route – in the hopes of not having to work on one anytime soon:)
Yamaha Canada’s current lineup.
Arctic Cat & Polaris Snowmobiles
There are also a few Arctic Cat and Polaris snowmobiles around, but they are nowhere near as abundant as they once used to be. Again, maybe it’s a regional thing, but I’m sure they both make good machines as they have been around forever. I just don’t know much about them, and I don’t write about things I don’t know.
One thing I do know is in the late 70’s, Arctic Cat was quite the player in the sledding world. We have an old 1978 Arctic Cat Jag, and to be honest, it’s my favourite sled. It’s a $600 buy from late last March that starts, runs, and stops, which is insane considering COVID drove prices to insanity.
How do you test a machine like this? Drive it!
Here’s a little teaser video from a 40km backcountry trail run we did the week we acquired the machine:
This machine is a champ and it deserves a blog post of its own so you’ll have to wait for that one. In the meantime, keep your eyes open for these older, less-powered units. These vintage snowmobiles are exceptionally fun, and if you have kids who are roaring to ride their own machines, these are ideal.
Snowmobile Annual Routine Maintenance
Here is a list of things I like to do with my sleds. None of which is rocket science, nor is it the be-all-end-all, but it should help keep you out of trouble. For anyone who maintains their sleds, your snowmobile maintenance checklist may be different, but this is what works for me.
1. Inspect Your Belt, Carry a Spare
Check your belt for rips, cracks, tears, etc. If in doubt, change it. Most sleds have a spot to carry a spare, and if not, simply take some zip ties and add it somewhere in the engine bay, away from moving parts and exhaust.
If anything breaks on a sled, it’s usually the drive belt. It’s not super expensive, and carrying a spare is cheap insurance to get you home. I also suggest you read the snowmobile repair manual or watch a YouTube video on how to change your sled’s belt. Save the video or take a picture of it on your phone, so you don’t have to physically carry the manual.
Don’t forget, there’s little to no cell signal in the backcountry, so don’t count on being able to look things up. I also suggest you practice changing the belt at least once, so you are not learning this on a cold or wet trail, in the dark when you are exhausted and just want to go home.
2. Inspect the Track
Does your track have any rips, frayed cords, cracks, and so on? If in doubt, get an opinion from a trusted friend or dealer. Mine was almost $1,000! It’s one of those items you don’t want to have fail in the bush, but you also don’t want to change it if you don’t have to. Don’t forget to look for missing or loose studs on studded tracks.
3. Change your Fluids!
Chain Case
Every snowmobile has a chain case. The oils vary from machine to machine so please take the time to look up what your sled needs.
Engine Oil
If it’s a 4 stroke, an annual oil change is a must. If you use your snowmobile a lot, you’ll require extra changes during the season, but I suspect if you use it that much, you won’t be reading an introductory post.
Modern 2 strokes have an oil reservoir and oil injector. It’s not a part of “changing” fluids, but do treat this like a part of filling up when you get gas. Don’t be lazy either, you’ll thank me when your machine doesn’t shut down for a low oil alarm in the middle of nowhere.
Coolant
I like to change the coolant on the snowmobile every 4-5 years. It can get corrosive for motors that have aluminum parts, not to mention, that it just gets dirty over time. When I do a coolant change, I flush and back flush everything until clear water comes through. Then I drain and fill with the correct mixture of antifreeze and water. Do check your level and condition before the season, and check your level from time to time.
Brake Fluid
Check your brake fluid, if applicable. It should be full and if it’s not, you probably have a problem that needs to be looked at. I drove clunker cars in my teens and classic cars in my better days, but I have never replaced brake fluid in any vehicle.
To each his own, but my take is, it’s hydraulic fluid that contains corrosion inhibitors. Yes, it absorbs water, but it’s in a sealed system. And technically there’s no real exposure to moving parts that would quickly degrade or dirty it. I’m not saying it doesn’t go bad, I would maybe consider a change every 5-10 years. However, I’ve yet to keep anything long enough to cross that bridge. If it gives you the warm and fuzzies, feel free to do it more often – just don’t blame me if you don’t.
Routine Snowmobiling Maintenance Scheduling Tip
I usually work on my sleds before the season, probably because it’s exciting. I also can’t seem to get into it in the spring. For what it’s worth, it would be better to do fluid changes before putting them away so they sit in storage with clean fluids.
For example, with boats, I change the lower unit oil in the fall on the day I cover the boat. It has to be done once a year anyway, and should there be a leak where water seeped in during the season, why risk a freeze? My point is, I have a schedule or routine that works for me. I know what gets done and when. If you don’t have your routine set, it’s probably wise to start. It keeps you accountable for your maintenance efforts.
4. Check your Plugs
If your sled is hard to start, has the occasional misfire or doesn’t haul like it used to, it’s time to change your plugs. Don’t forget to gap them before putting them in:)
Before you toss the old ones, you may want to learn how to read them. Sadly it’s a dying art, but reading your spark plugs will tell you exactly, cylinder by cylinder, what your engine is doing and the state of its health.
5. Fuel Treatment
I use premium fuel on my small engines like chainsaws, blowers, lawnmowers, etc., and I also toss the generators into this group. Not true for my sleds, ATVs, boats and so on. I just don’t see the need for the added expense. Unless you have a high-compression engine that calls for it, there’s simply no need for it. Many people may disagree with me on this and I respect that. But I have NEVER had a fuel-related problem.
Premium fuel doesn’t guarantee it’s ethanol-free either, which is why many people buy it to begin with. Ethanol use in premium varies from station to station, so be sure to ask or look for a sign if that’s the reason why you are using it. I’ll tell you from experience, that many gas operators can’t answer this question either. I’ve asked at stations without signage about their ethanol use.
What I do is add some Startron to all my gas cans before filling them. The gas cans end up in my engines so I have a system of constantly dosing and delivering a fuel system cleaner and fuel stabilizer. This way I know the carburetor or injectors, depending on the machine, are always getting a little cleaning. I’m also slowing down the deterioration of the gasoline and ethanol.
6. Fill Up!
A common problem people have is water in the fuel system. When the stator went on the Yamaha Attak, no less than 3 out of 3 neighbours who saw it not start stopped by to tell me I probably had water in the fuel. I am very proud to say that I have NEVER in my life had that problem. And, it’s because I fill up after each ride!
Most gas tanks are vented, meaning gas goes out, and air comes in. If it’s full of gas, there is no air space in your tank and no room for air – which can condensate into water droplets as temperatures go up and down. I also know for my next outing that I leave home with a full tank. The last benefit is if there is ever an emergency, whatever machine I grab is always ready to go!
I don’t generally trust gauges either, and it’s nice to see the gas come right up when I fill.
7. Check your Battery
When the snowmobile is in storage, I usually put an automatic trickle charger on for a day or two and I do this once a month. Always at the beginning of the month, to not forget. It’s not good for a battery to sit too long in a discharged state and NEVER store it on concrete.
Before the season, it’s good practice to check and clean your battery posts and cables to ensure good contact. Make sure they’re nice and tight.
I also have a digital load tester that will give me a percentage of battery life. It is surprisingly accurate and I bought it as I was a little tired of constantly guessing the health of all these different batteries over the years. I can appreciate not everyone has this tool, but if in doubt, some shops will check your battery for you.
For the roughly $150 that a battery costs, it’s just not worth taking any chances of getting stranded when it reads or acts (if you can’t measure) a bit weak. The Ski-Doo I have has a pull start, but it will not run without a battery! Maybe it’s a digital security key issue, I don’t know. But don’t count on the pull start alone.
8. Don’t Forget Your Lights
A brake light is a safety feature, make sure it works. As to a headlight, you won’t be riding at night without one, so double-check it. I also suggest checking it before any trip that potentially has you coming home in the dark.
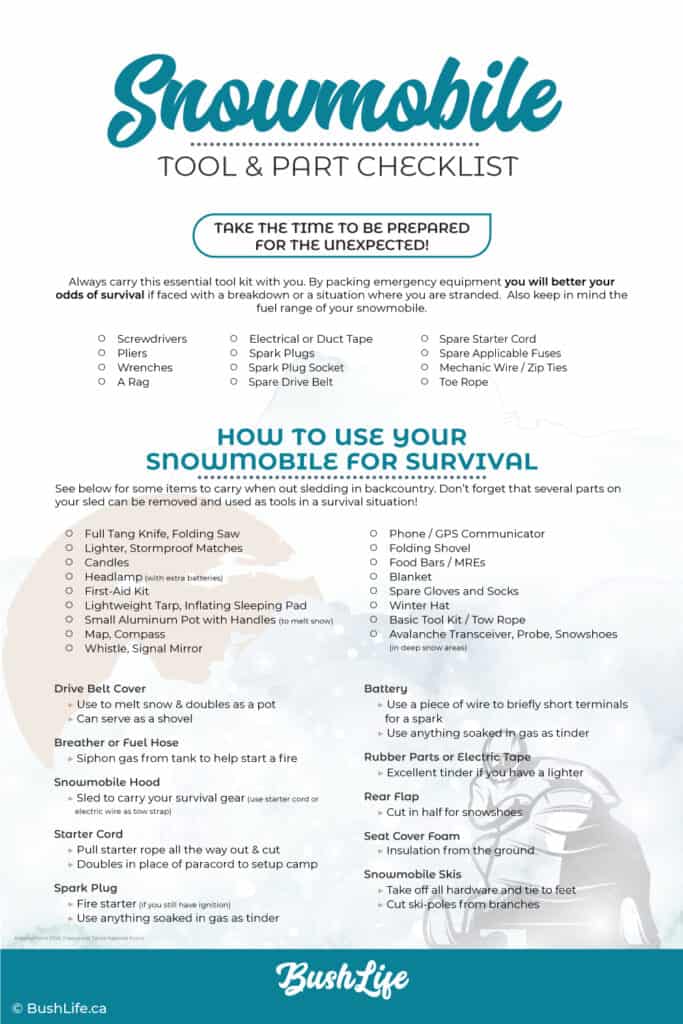
Snowmobile Tool & Part Checklist
Here’s a little infograph with some spare snowmobile parts and tools you should carry.
The latter half of the infograph gives you tips on how to use parts of your snowmobile in a survival situation. A link to download the pdf is at the end of the post.
Crossing on Ice, Safely
I don’t care what anyone says, no ice is safe! I’ve gone through and while I’m still here to talk about it, I will do my best to make sure it NEVER happens again, as believe me, it’s not pleasant! What we can do is make things as safe as possible. You can learn more about ice safety here.
Local Knowledge
2018/2019 was magical on my lake as the ice was several feet thick, providing a worry-free snowmobile ride. There were, however, parts of the lake where certain narrows that join 2 major sections of the lake were unsafe, even though all looked perfectly good from the surface. What makes it unsafe is the current under this section of ice.
This is where local knowledge comes into play, and my advice is to speak to the locals before heading out on unknown (to you) water bodies. You always need to know what areas to avoid. Locals and snowmobile clubs that regularly drill and measure ice thickness will also help with communicating when it’s safe to start venturing out.
Also, remember that measuring ice thickness in one particular spot means absolutely nothing a little farther down.
The Floatation Suit for Snowmobiling
I’m sure there are multiple companies out there that make great snowmobile suits, but we use FXR. Specifically, FXR makes a line of jackets and pants under their F.A.S.T. series that has built-in floatation. It’s meant to keep you above water, and warm long enough to hopefully buy enough time for a rescue.
It completely boggles my mind that we carry life jackets in the boat in case we need them – it’s also law by the way. Yet when facing the risk of taking a swim in ice cold water, with heavy winter clothes, boots, helmet, etc. most don’t bother to gear up. Without the proper gear, you might last 10-20 minutes in cold water. The shock it gives the muscles is tremendous and you’ve got multiple factors working against you. If you manage to escape and it’s cold enough outside, you may only have as little as 10 minutes to get dry and into a warm place. Please think about that very carefully.
Further Reading: F.A.S.T. Snowmobile Suits: Powerful Gear You Need to Know About
A forewarning that these floating or survival suits are not cheap, but then again, no amount of money in the bank matters when you are dead. I’d even go as far as saying consider it a part of the initial costs of buying a sled. It’s something I recommend to anyone who fishes, skates, walks or does any ice activity. I bought one for each family member and I make sure they wear them religiously before going on ice.
Ice Safety Picks
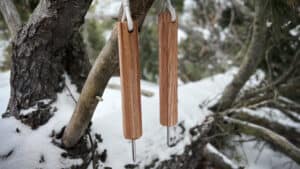
Eagle Claw Ice Safety Picks happen to be a fishing one, but they are all similar and provide the same function. The picks simply dig into the ice to give you enough grip to pull yourself out to safety. When I broke through, I was close to shore and swam out. It’s a completely different ballgame when you are surrounded 360 degrees by slippery ice.
Basic Snowmobiling Accessories
Helmet
A good snowmobiling helmet is a must. The law requires a helmet, but, unless you want your face and skull to freeze to a painful state, don’t skimp on this one.
The first year I used an M99 helmet/goggles combination from Royal Distributing. It got me through the season and it’s a good helmet, but air always leaked around the goggles. I had no choice but to use a balaclava, and even so, I would still be cold if sledding fast across the lake on a colder day. Trail riding was generally fine. It’s now my backup helmet, or for guests who don’t have their own.
We use Bombardier helmets. They are a game changer in my mind as the field of view is excellent. These helmets are very well sealed with no air seeping in. Its visor is heated, which aids in fogging, but you do need to have the corresponding plug on your sled to power it. I use the BV2S helmet myself and love it! It costs a fair bit but is worth every penny if you sled regularly.
Gloves
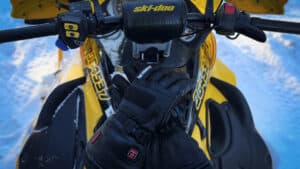
Your hands are the other main things that will quickly freeze up on you. Use some quality gloves and pray that your handlebar heaters are working. I have several amazing winter gloves, yet the only ones that keep my hands warm are by Canada Goose. These mitts are down-filled and super warm. As an update to the post, we discovered some heated gloves and it’s been a total game changer.
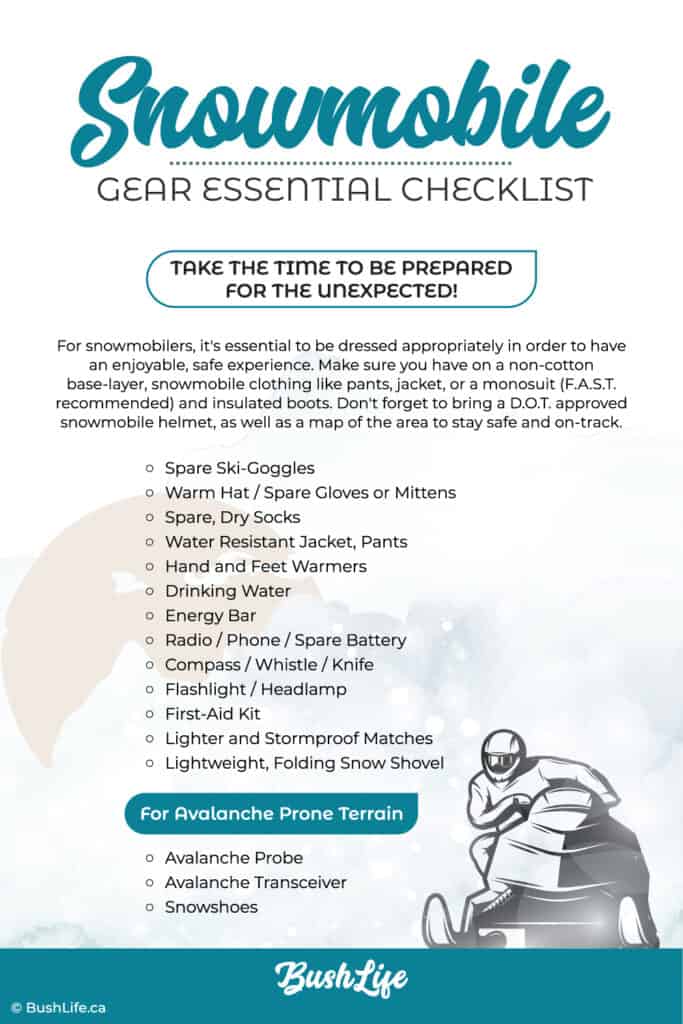
Essential Snowmobiling Gear Checklist
Another infograph with a bigger emphasis on snowmobile gear. Also included in the pdf at the end of the post.
Last But Not Least, Legal
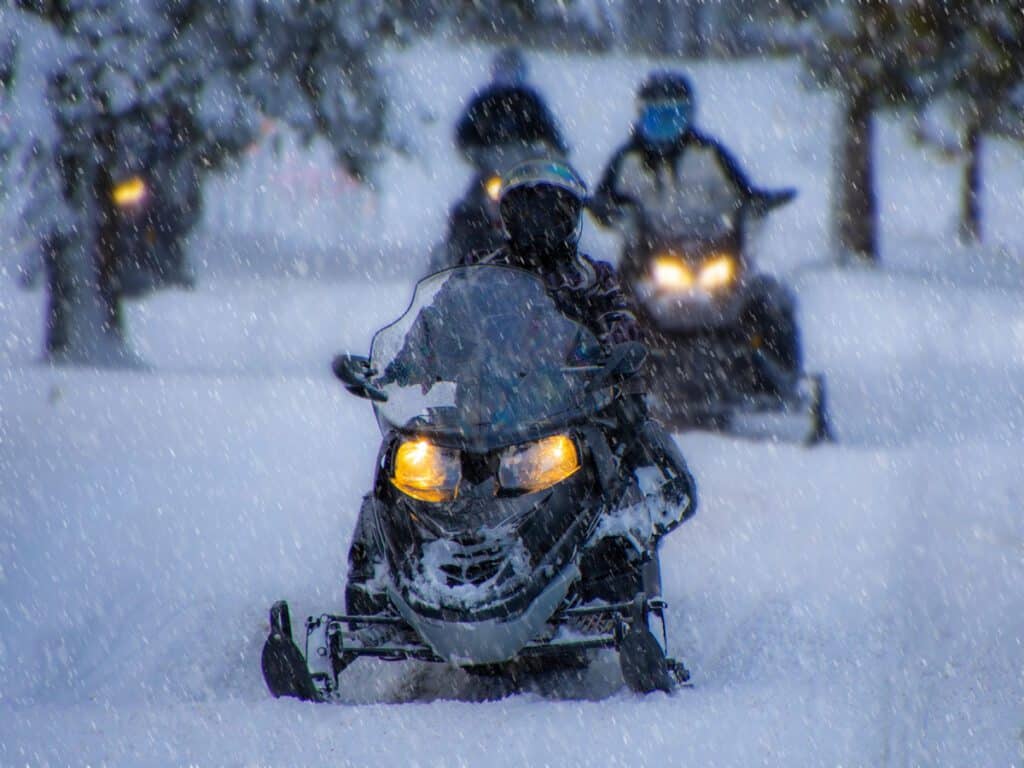
Yes, you need insurance… unless you stay on your property, you need liability insurance. If you are looking at buying a bigger engine sled like a 1000 cc or so, perhaps call and get a quote before you tie up the machine. Some insurers are weary of bigger engines on toys and will have higher rates. Others may refuse to insure altogether.
You also need a trail pass if you intend on hitting the snowmobile trails. Unlike ATVs, a trail pass isn’t super local. I’m in Ontario, and an OFSC trail pass covers the whole province. This is perfect considering many sledders like to do giant loops. I have quite a few things to say about the trail pass situation, but it is what it is.
Free Download
Click the download button below for your FREE PDF copy of our Survival and Breakdown Checklists:
Thank you for reading my Introduction to Snowmobiling. If you enjoyed this post, we invite you to like and follow us for more helpful content. You can also sign up for our newsletter to stay updated with our latest reviews and recommendations.
Bookmark this post on Pinterest for future reference!
