There’s a Lee Enfield rifle in my collection – over 100 years old, bolt barely moving, bore caked in decades of neglect. After an hour of cleaning, the rifling came back. The bore was in excellent condition. That rifle taught me more about proper cleaning than anything else I’ve ever read.
Let me share what I know.
We’ll also address how to deal with wet rifles, how often to clean them and how to properly store guns – from a rust and cleanliness perspective.
This is one of those posts where everything is heavily connected, and I suggest reading it in its entirety. I’ve also covered different levels of rifle cleaning, and it all builds on the previous. So grab a coffee, and let’s get started.
Disclosure: Posts may contain affiliate links. Purchases made through our links result in a small commission to us at no charge to you. We only recommend products that meet our brand standards based on testing and first hand use by our authors.
How Often Should You Clean Your Rifle?

After every time you use it! The most significant thing you can do as a firearm owner is clean your guns. My guns, whether new or old and by old, I mean 175 years old, work as they should. They are accurate, never jam, cycle smoothly and are free of dirt accumulation, oil varnish and rust.
You’ll find that some ammunition is dirtier than others. I bought some quiet (low velocity) .22 rounds. It’s a neat product that turns a .22 into a pellet gun, which is great when you don’t want to annoy the neighbours or are too lazy to visit the range. A single shot with these, and the barrel is filthy. I mean, it’s black and has chunks of powder residue. I don’t know about you, but leaving it in the gun seriously bothers me.
Does Cleaning a Rifle Affect Accuracy?
This is an interesting question. It is said, that every cleaning modifies accuracy or how the gun shoots. I’m just not seeing that. In my Henry US Survival Rifle Review, I discuss how I like to shoot.
A shooting bench is boring, as it takes so much of the challenge out of shooting. Put this way – there’s more satisfaction shooting freehand and hitting a smaller target like clay or metal that’s responsive versus shooting at a big piece of paper only to count how many millimetres each bullet is off.
When shooting a sporting clay or similar-sized metal, I find no difference in hitting something this size, anywhere from 40 to 100 yards, with or without the cleanings. Unless you are in target shooting competitions, I would prioritize cleanliness, rust prevention and longevity over millimetres.
What’s The Most Important Thing to Remember When Cleaning Guns?
Here are two steps to take before you clean your rifle:
1. Make Sure the Gun is Not Loaded
Not to bore you with safety stuff you’ve probably heard a million times, but check it anyway. I know myself, 100%, that I don’t store or transport guns loaded – and I’ll check again before I handle it, let alone clean it.
2. Make Sure the Gun is Not Wet!!
You just came in from a hunt or a target practice, but it was raining. No problem, don’t sweat it. It’s a good idea to wipe your wet gun with a dry and clean rag, pull the bolt and magazine (or open the action on a pump) and leave it be. Set it down for a few hours, or leave it overnight so it fully dries. Then you clean it later.
You’ll need to comply with storage laws.
A Note for Canadian Gun Owners: Canadian storage laws require the bolt stored separately or tossing a trigger lock back on. It doesn’t need to go in the safe yet, nor would I introduce any moisture. Put it somewhere secure and out of sight but in a dry and airy spot, and let it dry out nicely.
Pro Tip
Don’t forget the case! You had a wet gun in there! Some of us work hard to resist the temptation of tidying up right away. Unless you like mould and mildew, leave your case open and let it fully dry out.
I often go one step farther and run just one patch soaked in Ballistol down the barrel. It pushes out any moisture and leaves the bore with a light coat of oil. Doing so allows the Ballistol to work away at the fouling within the gun’s barrel. When it is time to clean the rifle, the fouling will come off easier. By fouling, we are talking about lead and copper residue.
FURTHER READING:
Protect Your Accessories Too! Don’t just clean your rifle – store your tags, tools, licenses, and small gear securely. The YETI LoadOut GoBox 1 has you covered.
Setup a Rifle Cleaning Work Area
This first step is an important step not to be overlooked. Set up a rifle cleaning station in your basement, garage, or anywhere you have a well-lit and quiet spot. Here, you’ll set up an area with your cleaning materials, oils, gun maintenance tools and some general tools.
The best rifle cleaning stand is the Tipton Gun Butler, which I use all the time. The tray holds all your rifle cleaning supplies like the jags, picks, oils, bore snakes and all the other goodies. More importantly, it acts like a gun vise and provides a solid rig to securely hold the rifle in position for cleaning, maintenance, or even adding accessories such as a scope.
A good friend of mine is a long-time hunter in his seventies. He has been through many rifle cleanings over the years, and I was surprised to learn that he didn’t have anything like the Tipton Gun Butler. So, the BushLife Santa made a special delivery that year. My friend never looks back – in fact, he swears by it!

Hate when your gun slips mid-clean? The Tiptop Gun Butler Gun Vice makes gun maintenance a breeze! This nifty, all-in-one solution simplifies cleaning, carrying, and storing. With thoughtfully designed compartments, it neatly organizes everything you need: bore solvent, jags, brushes, mops, a cleaning rod, spray lubricant, and even your essential tools. No more digging through cluttered boxes or losing track of your gear.
When you need to lay your rifle down, you will need something to place on your bench. Any visit to a gun store and you’ll notice these fantastic fabric, purpose-built gun mats on the counters. Unfortunately, they are not on the shelves for sale, at least not the nice, plushy ones. I’ve offered some nice coin to acquire such a nice rifle cleaning mat, but no shop has taken me up on it. As a workaround, you can sacrifice an old towel or a dish drying mat and keep it at the ready. All we need is something soft, which allows us to work without the fear of scratching our rifles.
Gun Cleaning Supplies: What Do You Need to Clean a Rifle?
- Tipton Gun Butler (not necessary, however, it makes life easier)
- Rag and/or Paper Towels
- Gun Cleaning Mat
- Ballistol or Cleaning Oil
- Rifle Cleaning Patches
- Cleaning Jags
- Cleaning Rod
- Bore Brushes
- Bore Snake (for quick cleaning)
FURTHER READING:
Did You Know You Can Upgrade the m870 Shotgun? Check out why a customized Remington 870 is the best shotgun you’ll ever find!
How Do I Do a Basic Rifle Cleaning?

If using your rifle to shoot less than 50 rounds, you can use a quick rifle cleaning method. Any more, and you will want a deeper cleaning, which we cover further below. Let’s get started with some simple rifle cleaning steps, which is the easiest and best way to clean a rifle.
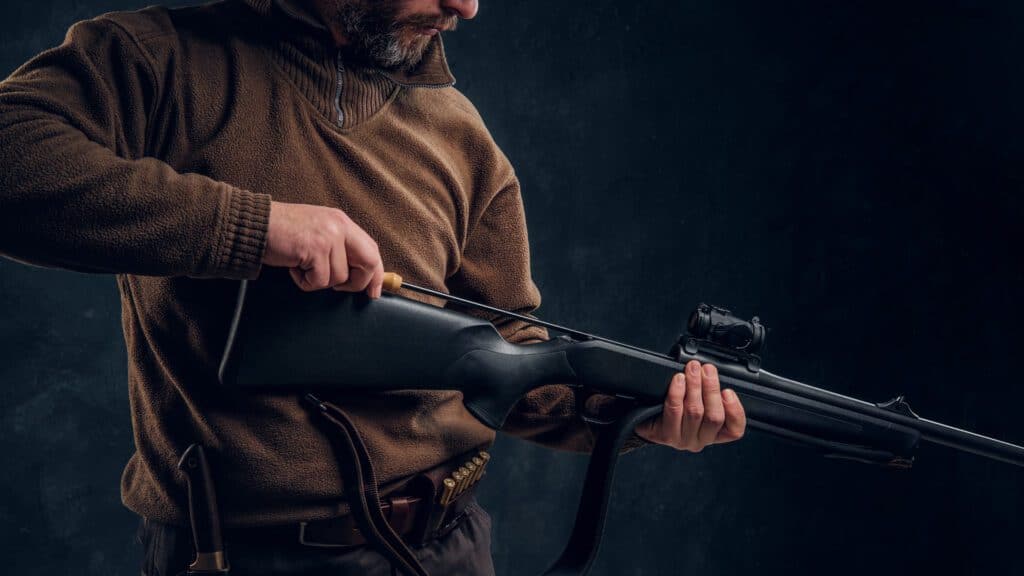
Pull the Bolt, Break Things Down
So you read my post and didn’t skip the parts where the gun is unloaded and dry – great! For bolt-action rifle cleaning, pull the bolt from a bolt gun. For a pump or semi-automatic rifle cleaning, disassemble it. Follow the manufacturer’s instructions on how to pull the bolt.
The first step to cleaning your firearm is to lightly oil the rag and wipe down the bolt. I like paper towels as they are clean, but feel free to substitute a clean rag. By wiping the bolt, it removes any residue. The oiled rag will turn black from carbon residue, and this cleaning process will leave a very light coating of oil to prevent rifle rust. In terms of oil, I LOVE Ballistol in spray form, which we’ll cover below. Now, let’s look at how to clean a gun barrel.
Start Running Patches
Now that the bolt is removed and clean – let’s run a solvent-soaked cleaning patch for rifles down the bore. Make sure to always run from the breech to the muzzle. This way, we push the dirt out of the rifle and not into the action! And by running patches, run them on a patch jag for a tight fit. Here is how you would use a cleaning patch in your rifle’s bore.
- First, run a Ballistol-soaked patch on a jag.
- Push it all the way through.
- Remove the patch when it comes out of the muzzle. Don’t let dirt back in!
- Gently pull the rod back. Be careful around the muzzle.
- Examine the patch. If it’s not overly dirty and has no loose crud, flip it and run it through again. The patch’s dirty side will hug the jag, not the bore.
- The bulk of the loose crud is now gone. Since I’m anal, I usually run a second oil patch.
- Go for a smoke, make a coffee, or tell your friends about my awesome blog. Let that oil soak for 10 minutes or so. Ballistol is a little slower as a solvent.
- Start running a couple of dry patches until they come out clean!
Remember
You can flip patches and run them through again if they are clean enough. It doubles their mileage, and it’s a lot cheaper this way.
If your patches fall off somewhere in the action, try this: Run your rod as far as the bore and stop shy of it. Then, hold the patch with your other hand right up against the entry to the bore and then push the rod through. It will nicely grab the patch.
Buy Your Patches In Bulk
Go straight for the 500 packs! It’s infinitely cheaper and saves you from running to the store every 5 minutes to pick some up. Besides, you’ll use them sooner or later.
Pro Tip
Get a clean rag, ideally a paper towel and wipe your rod EACH time you pull it out of the barrel. You’ll be shocked at how dirty it is, and while you are diligently swapping dirty patches for clean ones, your rod is re-inserting dirt. You’ll use fewer patches this way, and they will come out cleaner a lot faster.
Which Rifle Cleaning Rod Should I Use?
Very Important: It boggles my mind that we spend thousands of dollars on rifles only to run cheap $10 cleaning rods repeatedly down its most important part, the bore. Yes, the cheaper rods are soft metals like aluminum, but have you looked at yours closely? It’s probably very pitted.
These budget rods also bend very easily. My cheap .22 rods all bent, and then they get scraped by the bore, making even larger pits in the rod. Not to mention dropping aluminum dirt in the action.
You may argue that it’s on purpose that the cleaning rod takes damage versus the gun, and you are correct. The problem is these pits hold dirt, which scratches the crap out of your bore. The best rifle cleaning rod is the Hoppe’s One Piece Carbon Fiber Rod, but it’s not cheap. It’s also a boring purchase, to be honest, but it’s a genuine investment in protecting your precious rifles.

Isn't your bore worth a rod that won't bend? The Hoppe's Elite One Piece Carbon Fiber Cleaning Rod is a game changer for all your firearm cleaning needs! Crafted from lightweight carbon fiber, this 36-inch beauty makes cleaning your handgun or rifle a breeze. The ergonomic handle feels great in your hand, giving you the control you need without the fatigue. Say goodbye to cumbersome, heavy rods and hello to effortless cleaning!
Why Should I Use Cleaning Jags?

I started with black powder guns and cleaned them before I got into smokeless rifles. Jags are popular in black powder but not as much on smokeless, and I don’t know why. Sometimes, old school is just better.
Jags give a tight fit between the patch and the bore. The cheap and abundant rifle cleaning kits out there come with slotted tip attachments. I’m sorry, but it’s hard to trust that this kit will clean and/or coat all surfaces of the bore. It’s just too way loose.
The Tipton Ultra Jag and Bore Brush Set comes with 12 jags and 14 brushes. It’s cheaper buying a set vs individually, and more importantly, it gives you a nice holder that marks each jag’s calibre. These jags have a solvent-proof nickel coating and prevent false blue copper fouling. It’s what I use – in fact, every product linked in this post is the exact product I use myself.
Pro Tip
The odd time a brass jag may be too tight and will give you a hard time. Even then, I don’t use slotted tips. If this happens, wrap a patch onto a bronze brush for a tight fit. Be forewarned that after cleaning your rifle, you’ll be picking material out of your brush.
Cleaning the Bore of Non-Bolt Guns
Here’s where things get tricky, sort of. Semi-autos and pumps will not have that straight cleaning path from breech to muzzle. The problem is working a rod from muzzle to breech can damage the muzzle. Over time, you end up working away at the muzzle, which affects rifle accuracy. Do this long enough, and the rifle’s barrel is toast.
With these rifle types, this is an opportune time to run a bore snake, and we’ll cover bore snakes further below. The other option, if applicable, is disassembly. I wouldn’t dissemble it for a basic rifle cleaning unless it’s super easy – use a snake. But if you ever find your rifle disassembled, now would be a good time to do a deeper cleaning with a rod!
We’ll cover shotgun cleaning in a separate post.
FURTHER READING:
Interested in Muzzleloading? Check out our easy-to-understand beginner’s guide to Traditional Muzzleloader Shooting.
Cleaning the Action
I recommend wiping the action down and removing any fouling. If things are pretty dirty in there, refer to deeper rifle cleaning below.
Once the action and bolt guide is clean, it’s time to lubricate any moving parts. A common rifle cleaning mistake is overdoing the oiling. Doing so can cause jamming during cold weather, not to mention a mess. You’re looking to lubricate areas like the bolt guide, where you have metal-to-metal contact on moving parts.
Final Touches
At this point, wipe down all exterior metal surfaces of the rifle with a lightly oiled rag. It will not only clean things, but it will also help ward off rust. A rag can be better than a paper towel here, as some rifles have a rough finish that the paper towel shreds on.
Rifle Cleaning Methods: Let’s Look at a Deeper Rifle Cleaning
A basic rifle cleaning routine is what I generally do on my firearms or at least at minimum after each use. Every so often or after a heavy range day, it’s time to look at doing a deeper rifle cleaning. Everything above still holds – we will just add or modify a few steps.
2-Step Patch Process
Up until now, every reference to oil or cleaning solvent has been regarding Ballistol. Since we are doing a deeper clean, we will use a dedicated rifle cleaning solvent followed by oil.
STEP 1 in How To Clean a Rifle Thoroughly:
- We can modify the patch process from the basic rifle cleaning to run Hoppe’s Gun Bore Cleaner. Run one patch soaked with the Bore Cleaner through the bore, flip the patch, and run it through again. Then, wait around 5 minutes so it can work its magic.
- It’s time to run a bronze brush and scrub the bore of any lead and copper fouling. Run a patch to pull out any leftover junk.
- If the bore is still dirty or the patches won’t get clean, run a little more solvent and scrub with a bronze brush until you get a clean patch.
STEP 2:
- Finally, I like to run a lightly oiled patch as a final wash, followed by a dry patch. This last step is like an insurance policy to hose out solvent and double-check your work. If the patch is clean, you know you did good!
Cleaning the Action Thoroughly
Oil will varnish over time. It also attracts dust like a magnet – in addition to all the smokeless powder residue and environmental dirt that eventually build up in the action.
Remington sells a product called “Remington Action Cleaner”. Here is a quick run down on how to clean the action with Remington’s Action Cleaner.
STEP 1:
- Hold the rifle over a garbage can or take it outside and tip it so the liquid flows out. Spray it out well with the Remington Action Cleaner – it works phenomenally.
STEP 2:
- If you have compressed air, now is a good time to chase it.
STEP 3:
- The wash above removes a good chunk of the gunk and loosens the rest. Have a go at it with fine plastic cleaning picks and gun brushes to clean things out. A secondary rinse with action cleaner is advised.
It is said, “Never oil the action in light of jamming,” and I follow this. However, I have had some guns, usually older ones, with finicky or sticky trigger mechanisms. I admit a tiny spray of gun oil made things as good as new. It’s something we all advise against, but at times and based on need it has its place. Do, however, lightly oil the bolt guide and any moving parts.
Pro Tip
If you are in the boonies, in the cold and find your action jamming and don’t have a proper cleaner, you can sub lighter fluid as a wash.
Cleaning Neglected Guns
A Brief Story on Reviving a Lee Enfield Rifle
My mom bought me an old Lee Enfield Rifle for Christmas, over 100 years old. I landed at a gun shop in the middle of nowhere run by an older gunsmith who was semi-retired.
Upon inspecting the Lee Enfield, it looked pretty good, but the bolt was tight! The bolt guide had a very thick buildup of dry brown gunk. It was also very dusty. The gunsmith had a unique policy of leaving guns as traded, so you get a clear idea of how it was cared for.
It turns out this rifle was owned by an elder who passed away. God only knows it may have been on his mantle for half a century, but I can tell you no one shot or cleaned it in ages. I agreed to buy it if the gunsmith showed me the bore. He sprayed the bolt with light oil, and the gunk immediately loosened by a lot. This old gun was just in need of a deep cleaning! He then repeatedly ran a bronze brush down the bore bone dry!
Plumes of dust were coming out, and the bore yielded a tiny bit of shine – Ie. Acceptable but somewhat worn. I knew I could deal with that and maybe clean her up better. Keep reading as the story continues.
How to Clean the Bore of Neglected Guns
From a basic cleaning to a thorough one, we will need a few more steps to clean a neglected gun.
I learned something that day from that gunsmith. The crucial first step is to run a dry bronze brush repeatedly to remove a ton of junk from the bore. Without solvent, it’s so easy to blow out the dust. Nor does all that filth stick to the brush itself, which makes a mess onto itself.
On my Lee Enfield restoration, after getting home and running solvent through with a lot of bronze brush strokes, I would see a ton of sticky black gunk in the bore. And on the brush.
Once you add the rifle cleaning solvent, things can get sticky on a neglected gun. This is when you run a patch to pull the junk from the bore AND spray your bonze brush with some action cleaner. Then, you can go back to solvent and bronze brush strokes. You repeat this process over and over again until it’s clean.
This particular gun took about an hour of scrubbing just for the bore. I couldn’t figure out where all the dirt was coming from. Oil turns to varnish over time, and fouling can be brutal. As the rifle cleaning continued, the bore got shinier with each turn, and the rifling was coming back! It turned out the bore was in excellent condition after all!!
A neglected bore requires a lot of work, patience and materials. Be prepared to wear through your bronze brushes and expect to replace them before you tackle such a big project.
FURTHER READING:
Need a Carry Bag for Your Gear? Discover how a Possibles Bag is the easiest way to carry muzzleloading essentials.
Cleaning Effect on Cycling
After repeatedly scrubbing and rinsing the bolt and bore guide, the gun would cycle like butter. If you rotate the bolt up and not holding it, it pops back to the stopper. Not bad for a bolt that barely wanted to move.
Don’t Forget the Furniture
The wood furniture of a firearm will dry out over time, which is more prevalent on older guns where the finish may have worn off, exposing unfinished wood. Shy of a re-finish, it’s a must to moisturize any wood to prevent cracking. Ballistol is very safe and will clean and protect wood simultaneously.
When Should You Use a Bore Snake?
Bore snakes have their time and place. More and more people are moving to them as a primary cleaning method. I think it’s ok for basic cleaning, but you’ll never do a thorough cleaning this way. Some guns are so dirty that I can see the snake getting fouled before the gun is clean.
Bore snakes are great for a .22 rifle, as it can be challenging to get a rod through. Equally, semis and pumps benefit from the flexibility of the snake.
As to cleaning a rifle in the field, it doesn’t get better than carrying a bore snake! Its ease of use and portability are second to none.
I get that we are all pressed for time. The bore snake is more convenient and fast. Maybe I’m old school, but I don’t recommend it as your only cleaning method.
Cleaning with a Bore Snake
The small end of the Hoppe’s Bore Snake weighs it.
Once you open the action and tip the rifle, drop it in through the breech, and gravity takes over. The end drops right out of the muzzle.
At the beginning of where the thick floss starts is where you dab the solvent. Oil goes towards the end of the bore snake. Alternatively, Hoppe’s sells a one-step cleaner/oil. The floss generally has bristles to act as brushes, and the floss doubles as a patch. It’s pretty slick. Just grab the weighted end and pull the whole snake through the bore.
I usually run the snake through 2 to 3 times myself and then wash the snake with warm water and dish soap. Just make sure to hang the bore snake and air-dry overnight.
Let’s Talk About Ballistol for Rifle Cleaning
What do I use as a rifle barrel cleaner or a general cleaner? Ballistol, which is short for ballistic oil.

Sick of lubes that gum up your rifle? Meet the Ballistol Multi-Purpose Lubricant Cleaner Protectant! This handy product isn’t just for cleaning; it lubricates and protects your firearms, ensuring they operate smoothly and stays rust-free. It’s perfect for cleaning, protecting, and even rejuvenating wood finishes, so you’ll have everything you need in one convenient bottle. Say goodbye to that grimy buildup and hello to a cleaner, more reliable firearm!
Gun cleaning with Ballistol is almost a miracle oil that doesn’t resinify or varnish. It’s advertised as an oil that “cleans, lubes, and protects,” and it does. Ballistol is non-toxic, which is the reason I use it to clean and oil my knives with it as well.
Ballistol works on wood, leather, plastic and so on. We have no affiliation with Ballistol, so I’m passing it on for your reference, but this product has BushLife written all over it, as it caters to everything we talk about.
Where Can You Buy Ballistol in Canada?
Every single reference to oil in this post is Ballistol. Check your local stores for it, as I have seen it at firearms stores, Sail and Canadian Tire. It’s worth the effort. I have also included an online link to it here.
If you can’t find Ballistol, I suggest Remington’s Rem Oil as a light oil for bolt guides or where a spray is needed. For bores, it’s Hoppe’s No. 9 Lubricating Oil.
Can You Clean Your Gun with WD-40?
Gun cleaning with WD-40 is an absolute NO! While we all have and generally love WD-40, don’t use it on guns! It is primarily a solvent not suited for gun-type fouling. WD-40 is very flammable – which has no place in firearms. Most of all, it leaves a waxy residue.
Rifle Storage After Cleaning
After every cleaning, I run one final VERY lightly oiled patch down the gun bore. It just helps ward off rust as the rifle sits in storage. If any fouling was missed during the cleaning process, it will work away at it for the next cleaning.
If you do oil for storage, make sure to run a dry patch through before you head out and fire your first shots. Oil in the bore can increase pressures, which is not safe.
Firearms are best kept in a locker or safe. It’s your personal choice. Just be mindful of humidity. In the summer or part way through spring and fall, humidity can get out of hand and cause rust. You can offset this by keeping a moisture-absorbing humidity pack in the locker.
Alternatively, in the winter, things can get very dry. In fact, across Canada and in the northern US, when you heat already dry winter air, the relative humidity level nose dives. To the point that it can be drier than the Sahara desert. During these times of long-term storage, it is best to occasionally treat any wood furniture on your firearms with some lube.
One Final Rifle Cleaning Accessory
Before you go, I must show you one of my favourite cleaning accessories. Walking into the gun shop, I stumbled on a case by accident. They only had a couple, and I haven’t seen them in-store anywhere else. I love this case!
The MTM CRC Gun Cleaning Rod Case is almost 4 feet long! In other words, it holds cleaning rods assembled which is a lot nicer than having to screw them together each time you need them. For one-piece rods, it safely holds them from getting damaged.

Bent a cleaning rod lately? Don't. Clean your firearms with ease using the MTM CRC Gun Cleaning Rod Case! This handy case is designed to hold up to four cleaning rods up to 47.5 inches long. With its cushy foam padding, your rods are cradled in individual slots, preventing any jostling during transport. But that’s not all! The case also features special compartments for all your essential cleaning supplies like patches, jags, and brushes, so you’ll always have everything you need right at your fingertips.
The MTM CRC Gun Cleaning Rod Case has various-sized patch holders, and the thing I like most is it holds all of this stuff in a sealed box, preventing dust or dirt. It’s not for everyone in light of its size, but it’s one of my favourite gun gadgets so to speak.
The Bottom Line on Rifle Cleaning
Clean your guns after every use. Every single time. It takes 15 minutes with a basic clean and it’s the single most important thing you can do to protect an investment that could last generations – or in the Lee Enfield’s case, already has.
Start with Ballistol for everything basic. Add Hoppe’s Bore Cleaner for the deeper cleans. Get the Tipton Gun Butler if you shoot regularly – you’ll wonder how you managed without it. And for the love of everything – no WD-40. Ever.
More From BushLife on Guns & Gear:
- Custom Remington 870 Review: the shotgun worth cleaning properly
- Henry AR-7 Survival Rifle: lightweight rifle, same cleaning principles
- Muzzleloader Possibles Bag: carry your cleaning essentials in the field
- Traditional Muzzleloader Guide: black powder cleaning covered in depth
👉 Any questions on your specific rifle or cleaning situation – drop them in the comments. I read every one.
Don’t forget to subscribe to our newsletter for more great content.
Bookmark this post on Pinterest for future reference!